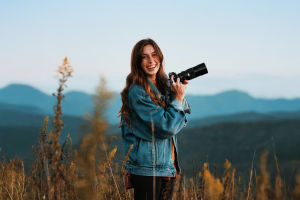
Lighting is one of the most important elements in photography, especially when working in a studio environment.
Photographers often spend a lot of time selecting light sources, adjusting modifiers, and experimenting with different lighting angles.
While reflectors and diffusers are commonly used tools for shaping light, many photographers overlook another extremely useful tool: flags.
Flags allow photographers to remove unwanted light from specific areas of a scene. Instead of adding light, they help control exactly where the light should not go. This subtle adjustment can dramatically change the mood, contrast, and depth of a photograph. With careful placement, flags allow photographers to shape light with great precision and create more refined images.
Understanding the Role of Flags in Studio Lighting
1. Flags are objects used to block or cut light from reaching certain areas of a scene.
2. Unlike reflectors that bounce light or diffusers that soften it, flags control light by removing it.
3. This ability allows photographers to manage shadows, reduce glare, and increase contrast in an image.
Everyday Examples That Explain How Flags Work
1. Many people unknowingly use flags in everyday life.
2. Closing curtains to block sunlight from a television screen is one example.
3. A car's sun visor also functions like a flag by preventing unwanted glare from entering your eyes.
Common Materials Used to Create Flags
1. Photographers often use black foamcore, cardboard, or dark fabric as flags.
2. Foamcore is particularly popular because it is lightweight, affordable, and easy to cut into different shapes.
3. Many photography reflectors also include a black surface that can function as a simple flag.
Why Building a Lighting Setup Step by Step Matters
1. Complex lighting setups work best when constructed gradually rather than all at once.
2. Start by placing your subject and deciding on the composition of the image.
3. After the basic lighting is established, adjustments such as flags or reflectors can be added to refine the scene.
Step 1: Position the Subject and Light Source
1. Begin by arranging your subject and placing the main light source in the desired position.
2. Set the exposure so that highlights remain slightly below the point of overexposure.
3. This approach provides flexibility when adjusting lighting later with flags.
Observing the Initial Lighting Result
1. The first test image often shows a balanced exposure but may lack visual drama.
2. Background areas might receive too much light, making the subject blend into the scene.
3. This stage provides the foundation for further lighting control.
Step 2: Use the First Flag to Darken the Background
1. A flag can be placed between the light source and part of the background.
2. This blocks light from reaching certain areas without affecting the subject.
3. The result is a darker background that helps separate the subject visually.
Finding the Correct Position for the Flag
1. Move the flag slowly while observing how the shadows change.
2. The goal is to reduce background brightness while maintaining the subject's exposure.
3. Once the correct position is found, clamps or tape can secure the flag.
Step 3: Add a Second Flag for More Control
1. Sometimes one flag is not enough to achieve the desired lighting effect.
2. A second flag can block additional light from other parts of the background.
3. This further increases contrast and helps create a more focused composition.
Maintaining Light on the Main Subject
1. While adjusting flags, always ensure the subject remains properly illuminated.
2. Blocking too much light may unintentionally darken important details.
3. Careful positioning allows you to shape light without losing clarity.
Step 4: Introduce a Reflector if Necessary
1. After darkening the background, shadows on the subject may become too deep.
2. A reflector can bounce light back onto the shadow side of the subject.
3. This restores balance while preserving the dramatic contrast created by the flags.
How Reflectors Restore Visual Balance
1. Reflectors soften harsh shadows without eliminating them completely.
2. The added light helps separate the subject from the darker background.
3. This combination of flags and reflectors produces a more three-dimensional look.
Comparing Images Before and After Using Flags
1. The original image often appears flatter because light spreads evenly across the scene.
2. After adding flags, the background becomes darker and the subject gains more visual depth.
3. The improved lighting also reduces the need for heavy editing later.
Applying Flags in Different Photography Genres
1. Although this example uses a small tabletop subject, the same principles apply to larger scenes.
2. Product photography frequently uses flags to control reflections and highlights.
3. Portrait photographers also rely on flags to shape subject lighting and reduce unwanted spill.
Conclusion: Precise Lighting Control Leads to Better Photos
1. Flags are simple tools that give photographers precise control over where light appears in a scene.
2. By gradually building a lighting setup and adjusting light with flags and reflectors, photographers can create stronger images directly in camera.
3. With practice, this technique can dramatically improve studio photography and reduce the need for extensive post-processing.